Ever since we bought our house in 2009 I had been wanting to paint the walls. The previous owners did not take very good care of them. There was crayon, scuffs and just a bunch of stains all over. When we tried to clean them off the textured part of the wall would come off too. These new developers try to cut any corners they can and quality paint was probably the first thing to go. After being in the house for 2 years I finally saved enough money for paint. And since I had 2 years to dream about it the dream had gotten really big.

~~~
For the Boys Room I decided to do a space ceiling and walls of sky. My wonderful husband did all the hard work of priming and painting the walls. We definitely paid for the quality stuff that will be easily washable.
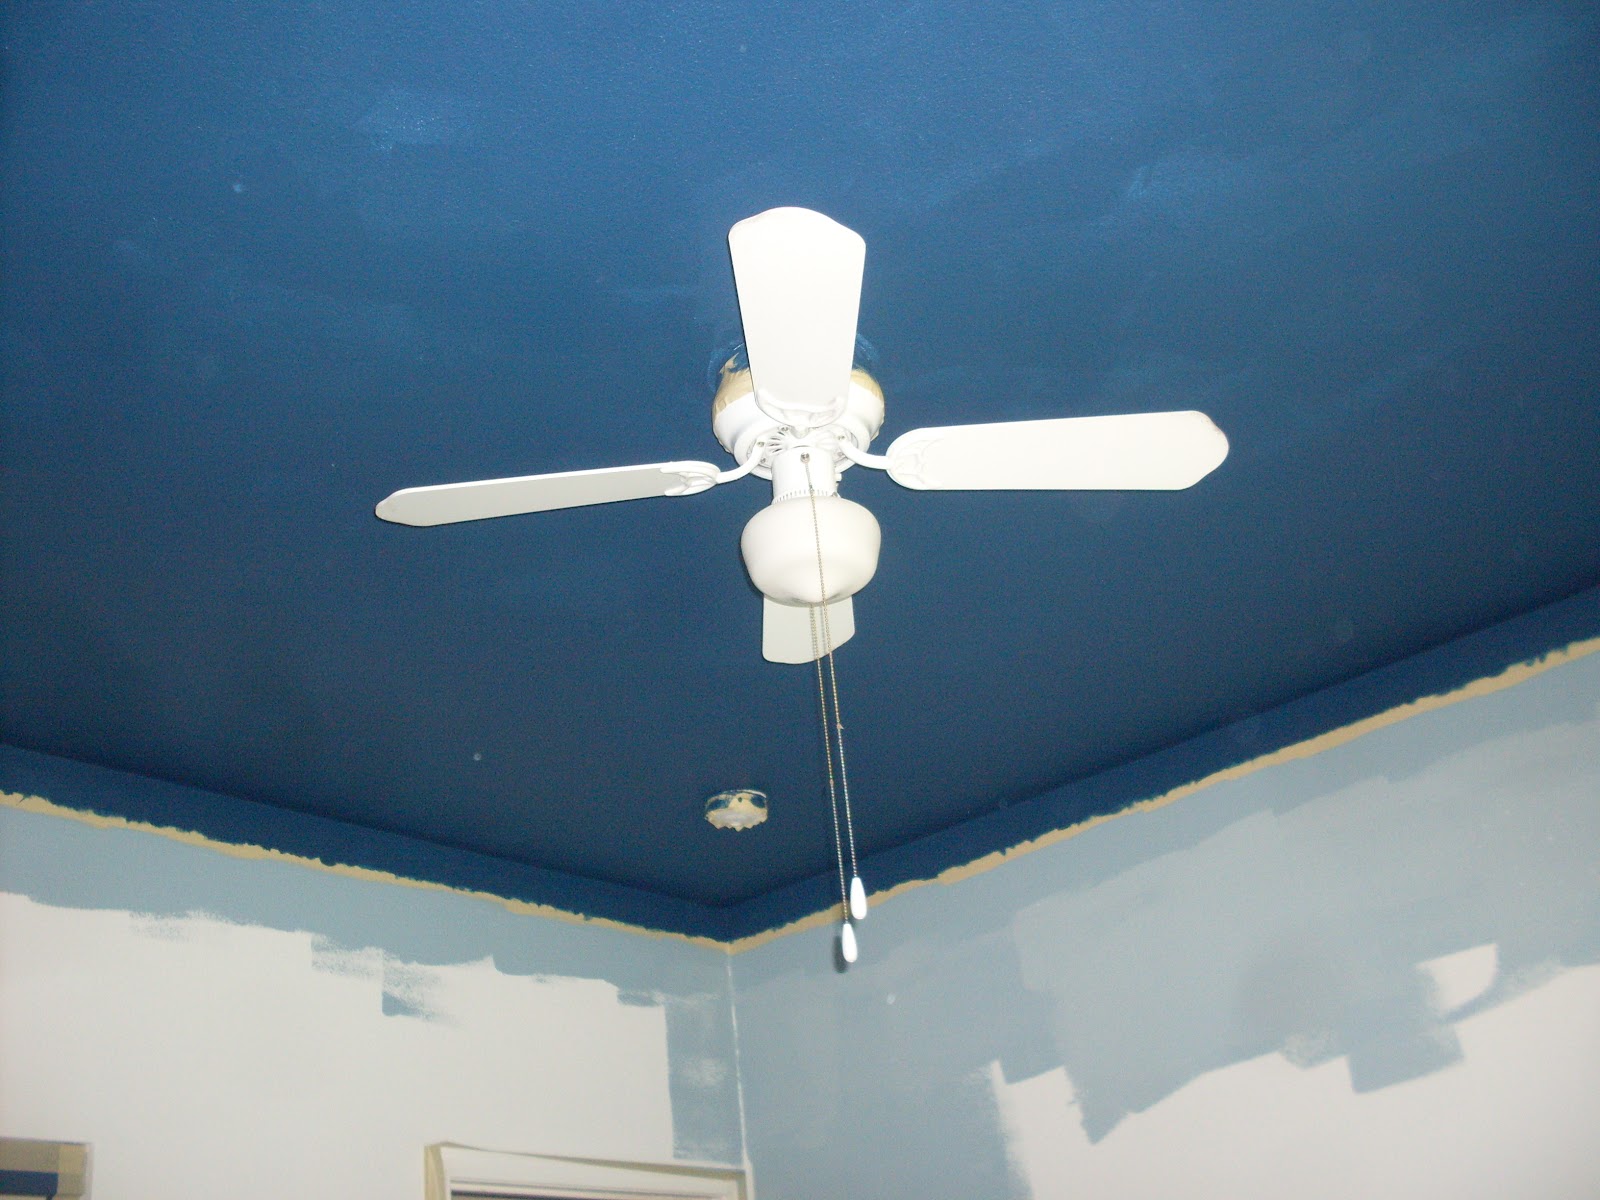
We added a little section of magnetic paint behind where the door opens. We were amazed at how easily the blue went over the black. I thought it would turn out grayish or something but you really couldn't tell the difference of where it was on the wall.
(Do you like the gate to keep the kids out? Yeah that was a must)

Here was the staging of where things would end up in the room. I knew I wanted a few planes and also a formation of fighter jets.

I had a vision of a whole fleet of hot air balloons

And there had to be some words, Dr. Seuss seemed appropriate in this room.

Now to start painting. I just used whatever acrylic I had and mixed the colors I needed. I did end up going to the store for a few more colors.

I decided to tackle the biggest image first: The shuttle launch. I had heard about a method from one of my friends on Facebook for using an overhead projector to project the images on the wall. I borrowed one from my church and it was very effective. I just found images from online and printed them out. I ran a few of my laminate sheets through the laminator to create a transparent sheet. I traced the images I wanted to project onto the now transparent pages. They were only an inch or so big and you just place the projector closer or farther to get the size you want on the wall. Then you trace the image with a pencil onto the wall. Now if you do mess up it can erase if you used the high quality Satin or gloss paint. I'm not sure if it would erase off of flat paint.
~~~
Then you just start filling it in with paint. Now I will admit I am NOT an artist. I am a perfectionist though. So since I had a traced image I was able to do a pretty good job with it.

The kids got to help with the smoke.

Almost finished. After I had painted the grays and white, I projected the image again to retrace the details on. I bought the Sharpie Paint Pens to outline everything. I knew it would make the images really pop out and smooth out the rough edges of the paint.

The Masterpiece. I was pretty proud of my flames and smoke job. It isn't entirely symmetrical but it was free hand and I already told you I'm no artist just a perfectionist.

The first plane with the projector on it to get the details on.

The second plane. I used a stencil to get the circles more equal than simply tracing the projectors image.

The third plane. I was trying to avoid girl colors but I did want to have a variety.

There was a blank spot on the wall so I made a fire plane.

I made another stencil for the Fighter Jets because the projector was hard for this.

Here is my Rain Cloud raining over the Rainbow which is protecting our framed magnetic board. The white circle is just the door knob guard.

Next to the window

Next to the rainbow.

The whole "Plane Wall" after the clouds were added.

You may notice the white border between the sky and space. This wasn't really planned ahead of time. We put the tape 3 inches down from the ceiling when we painted it because I knew I needed some type of border to separate space from sky. I had planed on doing a row of stars all the way around. But I was nervous about putting the tape over our new paint. So I decided to just leave the tape where it was and then once we were done painting the sky, I turned it into a big long cloud. I think it provides the perfect atmosphere change.
~~~
It took me awhile to figure out what to do with the closet. But I settled on a "tree house" the plan was to fasten a green sheet to the top of the closet so it could be more like a club house. I still haven't done that part yet.

But here are my cloud words made by the crop duster plane.

And the shelf John built for the closet.

Time for the ceiling. I used this green stencil that had 5 stars on it for all the stars. Just putting it at different angles and such. I used a plate to trace that planet. I also used the laminate to make a stencil for the space ship and a few other things for space.

More stars. My neck and arms got really sore from this.

Here is the finished ceiling from all angles. The rock belt was my favorite part of the finished space scene, but I do have all 9 planets (because I still consider Pluto a planet, or at least believe the kids should learn it used to be one.)
~~~
The base of the ceiling fan got painted like the sun, however I didn't really try too hard to keep the planets measured correctly. I had wanted to but it didn't really make sense to do it to scale. But I did try to keep the planets that are next to each other in the same general area and I did try to get them to look like the real planets according to whatever website I found that seemed accurate. Like here you have mercury (grey and black) and Venus (yellow)

Here is Earth and Mars. The white rectangle is where the vent goes. Eventually I will paint it blue to match and put it back up. I'm hoping it will look like a black hole or some type of astronomical phenomenon.

Here is Jupiter and Saturn

Saturn near an alien space ship

Here is Neptune and the space shuttle that is now in space

A rocket ship, flying saucer and a comet near Venus

Jupiter near my awesome rock belt

Uranus (green) and Pluto (brown) plus another rocket ship and comet

A couple of the satellites near earth and Uranus

A bigger chunk of the ceiling plus a sneak peak at the last part of the wall.

I knew I had to have a helicopter if I was covering air vehicles but it didn't fit on the plane wall. We decided it needed to be in the dead space between the shuttle Launch and the Balloon Fleet.

Here is the start of the fleet. I used 6-8 different sizes of stencils to trace the balloons. Then as I was using colors for other things I would go paint a balloon while I had that color out.

This is a little further along. I had painted all the baskets at this point.

We were pretty close to presenting the room to the kids but the balloons were still not done. We decided to paint the remainder of them white so that you could get an idea of it and then we just left them like that for a few months.

In July when Michael was staying with my sister for a week we got back to it. I used stencils, free hand, rulers, pictures and whatever else I needed to get it done good. It definitely looks very 2D but the rest of the room does too so it's all good. They looked way better once I outlined them. Here are the 2 sides of the corner and then some close up pictures of most of them. Different categories to look out for: Super Heroes, all kinds of balls, bugs, holidays, remote symbols, Yoshi eggs and then a few random patterns and other things that I will help you out with along the way.


The green one on the bottom is Golf and the Yellow one is inspired by Charlie Brown. The Pot of Gold at the end of the Rainbow is to represent St. Patrick's Day.

The bottom one is just an ocean scene and the brown one with black lines is supposed to be a barrel but it didn't turn out too good. We have a couple patriotic ones to cover Independence Day and Memorial Day


The pink one with the 4 white dots is supposed to be a button and the green one with the three darker spots is supposed to be a bowling ball. Then there are 4 holidays in this shot, Valentines Day (Hearts with LOVE), Halloween (Jack-o-lantern), Thanksgiving (Black Pilgrim Hat) and New Years (Fireworks).
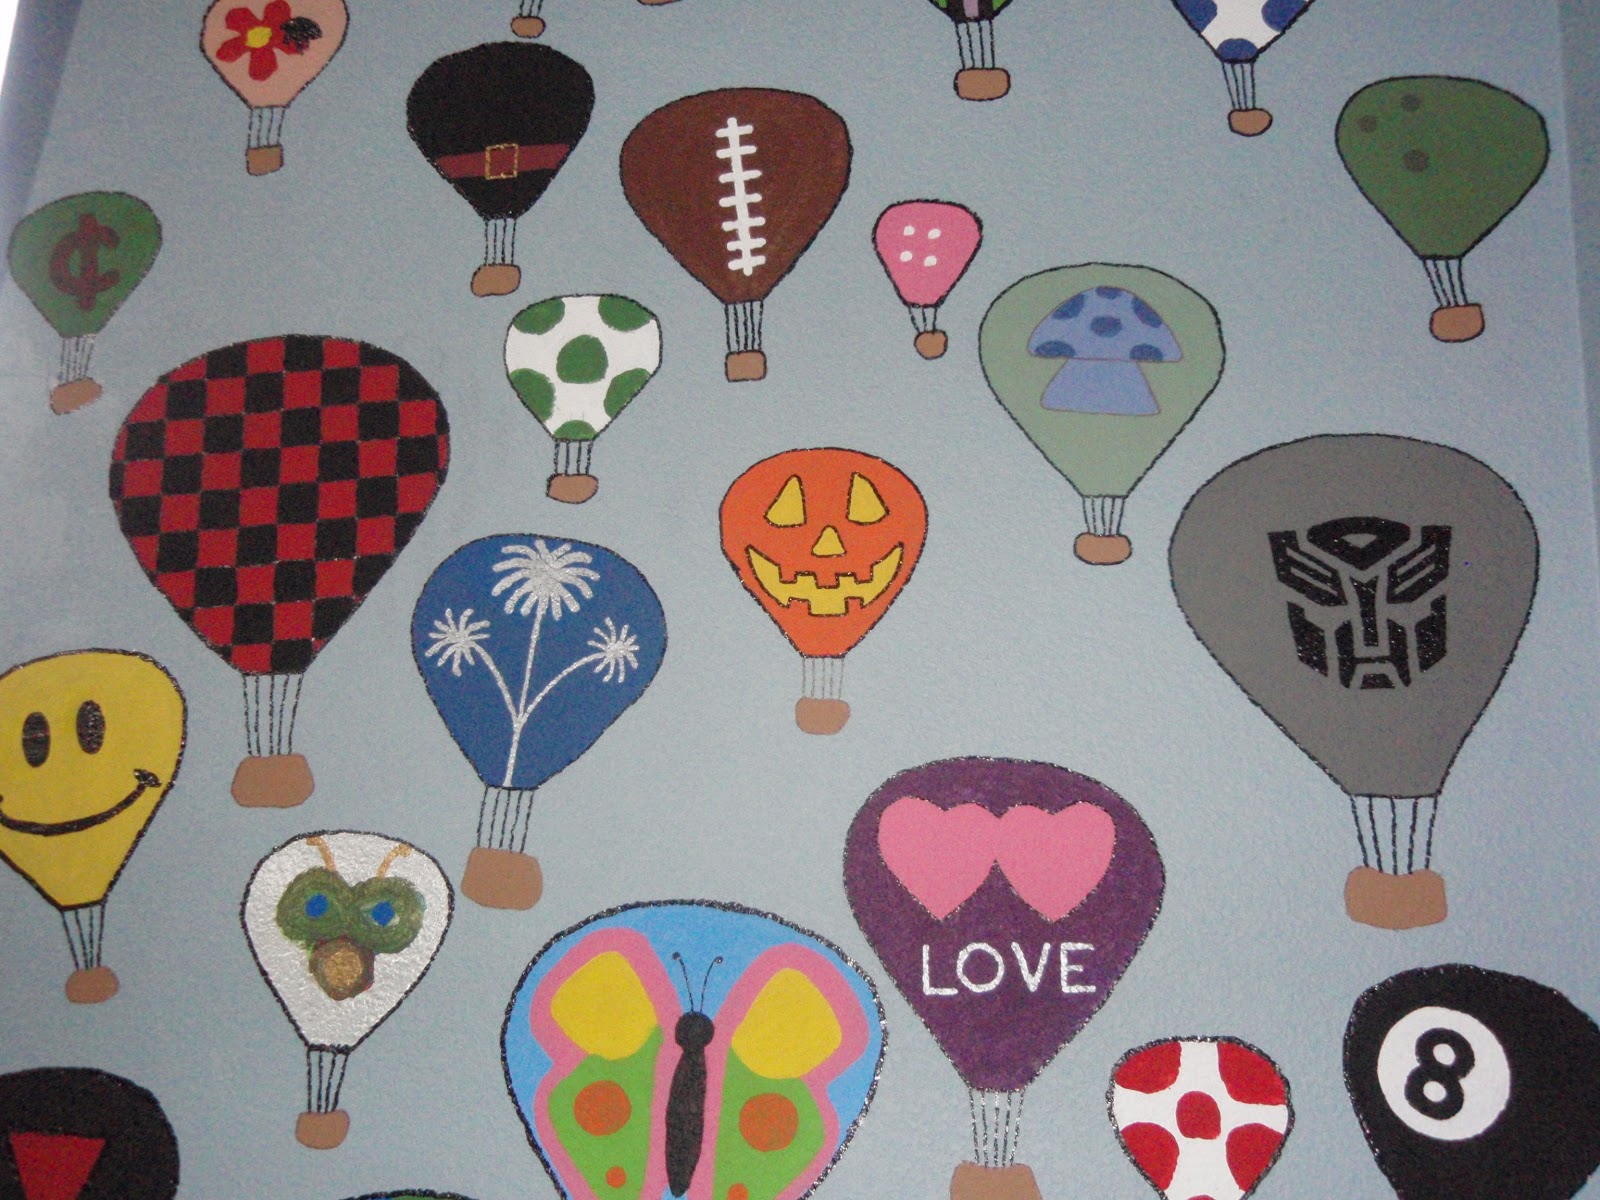
Here are some of John's Remote Symbols, the Yellow Yoshi Egg, a caterpillar on a leaf, a beetle on a flower and other math and punctuation symbols including Pi.

More symbols floating over the window.

Musical instrument, a few striped patterns and the blue Yoshi Egg.

Music notes and CTR shield. The Green one is an Easter Egg and the green spotted purple one is inspired by Barney.

A Drum and the Bells are for Christmas. I was pretty proud of my Volley Ball too.

The yellow and black one is our Bee and there are a bunch of miscellaneous patterns.

The mushroom was from early on and it just looked good so we left it.

My Lady bug and a beach inspired one (I just wanted to have "Footprints in the Sand" to represent one of my favorite poems)

The whole Corner Fleet.

So this was a HUGE project. It took about 3 weeks in April before we let the boys move in on Easter 2011 and then there was the week in July we spent finishing the balloons. Also Easter Weekend is when we moved the kids into the Living Room and we painted the Girl Room and presented it to her on Easter too. I will make a separate post for that room though but it is for sure not as exciting as this one.